Your Favorite Movie in a Single Picture
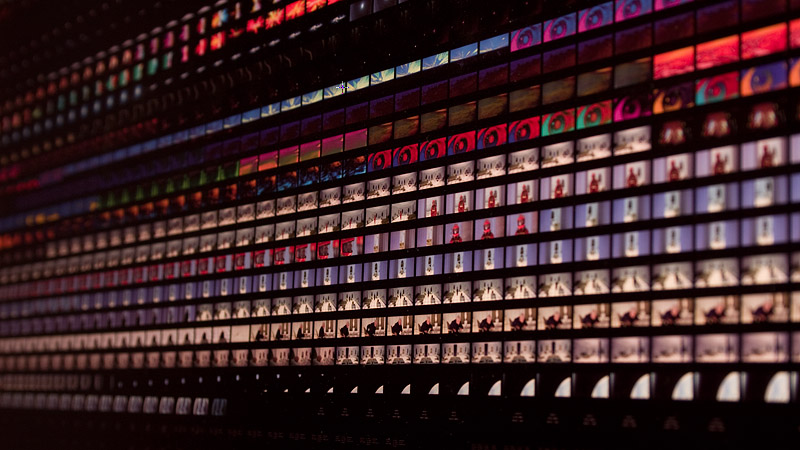
Almost seven month ago I wrote about my experiments of “compressing” a whole movie into one single picture. A screenshot of the movie is taken every second and the screenshots are then combined into one big image. 60 frames per row, one row for each minute of film.
I tried this technique with a lot of different movies, but the one that looked most interesting turned out to be Stanley Kubricks 2001: A Space Odyssey. Now I’ve finally got it printed, glued onto a frame and hanging on my wall. I’m very pleased how the print turned out. Every single image is only 11mm wide, but you can still make out a lot of details.
Here's the full resolution PNG: 2001-13-36-final.png, 140 MB
Read on for a short tutorial to make your own movie poster like this.
Things you need
- VirtualDub (I used version 1.8.6)
- stitch.exe
- A Movie
- Lots of RAM (2GB seemed to bee enough for most image sizes)
Exporting the screenshots
Your movie must be in AVI format so VirtualDub can load it. Just ask google about how to convert your DVD to an AVI file. There is also a VirtualDub mod that loads MPEG2 files directly, but I haven’t tried it yet. Quality isn’t that important at this point, because the final frames will only be a cm in size anyway.
Open the movie in VirtualDub (File->Open video file…) and add a Resize Filter (Video->Filters…). Scale it down to about 25%, depending on the size of the original. Anything between 100 and 200 pixels width works fine. Choose Lanczos3 as Filter mode. Add the Resize Filter with OK and also close the Filter Window with OK.
Next, go to Video->Frame Rate…, choose Convert to fps at the Frame rate conversion panel and enter 1.0 in the input field. You don’t need the Audio Stream, so disable it at Audio->No audio. Make sure your movie will be saved Uncompressed (Viedo->Compression…). Now save the movie with File->Save as AVI… – this might take a while. Close VirtualDub when it’s done, to reset its setting.
Start VirtualDub again and open the AVI file you just exported. Now go to File->Export->Image Sequence… Choose JPEG with 100% quality as the ouput format (PNG export seems to be buggy my version) and click OK. You should now have a few thousand screenshots somewhere on you HDD.
Putting it all together
Extract the stitch.exe and stitch-create.bat in the parent directory of your screenshots. E.g. my screenshots are saved in E:/poster/images/the-fountain/ and my stitch.exe is in E:/poster/.
Open the stitch-create.bat with a Text-Editor (Rightclick->Edit). The stitch-create.bat just calls the stitch.exe with a few parameters. The first parameter is a file-match to your input images, the second one specifies the name of the output PNG file. The following 3 Parameters are the values for images per row (default 60) and the width and height of the spacing between single frames. The last two parameters are for scaling of the input images – the quality of this rescaling isn’t that good; you should use it for testing only. When you’re done, just save the stitch-create.bat and execute it. Cross your fingers that you’ve got enough RAM and wait a minute.
I did use Photoshop after that to put a frame around my 2001 picture. But that’s totally up to you.
For all the Linux and Mac users out there: Here’s the source file (PHP) for the stitch.exe: stitch.php.zip Since VirtualDub is only available for Windows, you’ll have to find another solution to export the screenshots. I know that mplayer has some command line switches that might work for that.